How to Create Tax Rules in Magento2
Greetings of the Day My Friends!!!
We are welcoming you all in our learning session for “How to Create Tax Rules in Magento2”
Tax rules are the collection of the tax classes for products & customers and tax rates as well. You can define as many rules you wish to for your Magento2 store, and if you have installed Magento2 store with some sample data, there might be some instances of tax rules given.
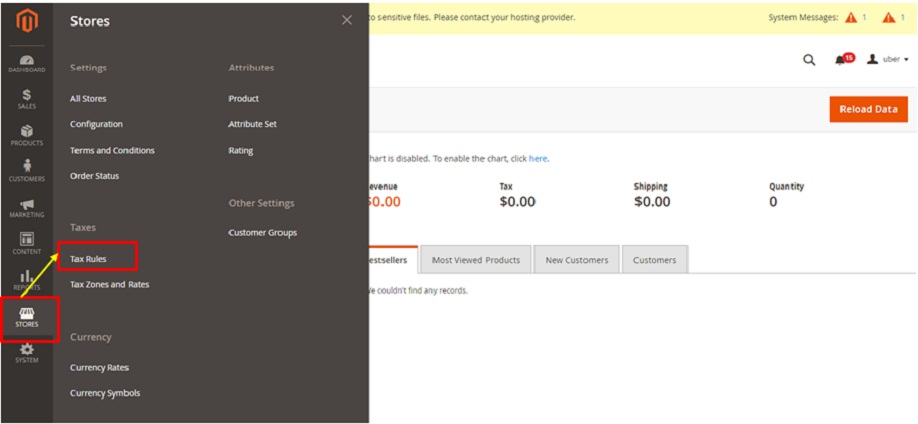
So let’s start framing the Tax rule by diving into “Magento2 Admin Panel”, from where we will be leaping to “Stores” section and fetch the option of “Tax Rules” falling under the title of “Taxes”.
Admin Panel → Stores → Taxes → Tax Rules
This will open the current screen for “Tax Rules” having the existing tax rules of store. In order to add a new rule we need to select the right above button “Add New Tax Rule”.
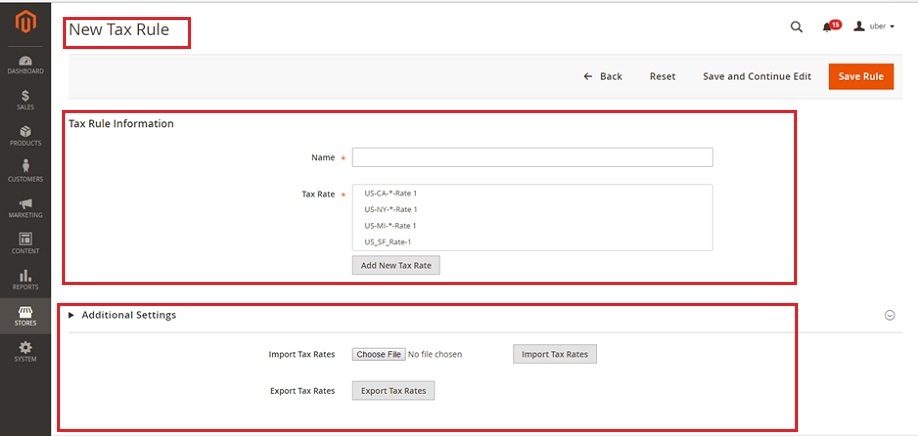
Screen for “New Tax Rule” is now in front of us, which is available with various options falling under two titles i.e. “Tax rule Information & Additional settings”.
Starting from Tax Rule Information, we have the following options:
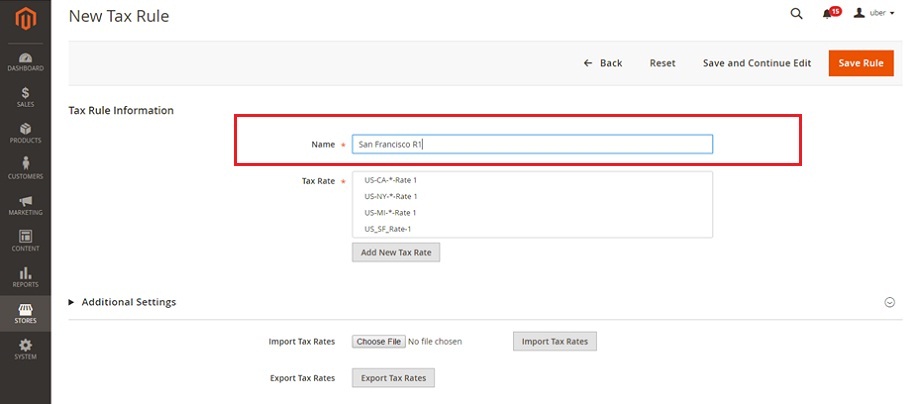
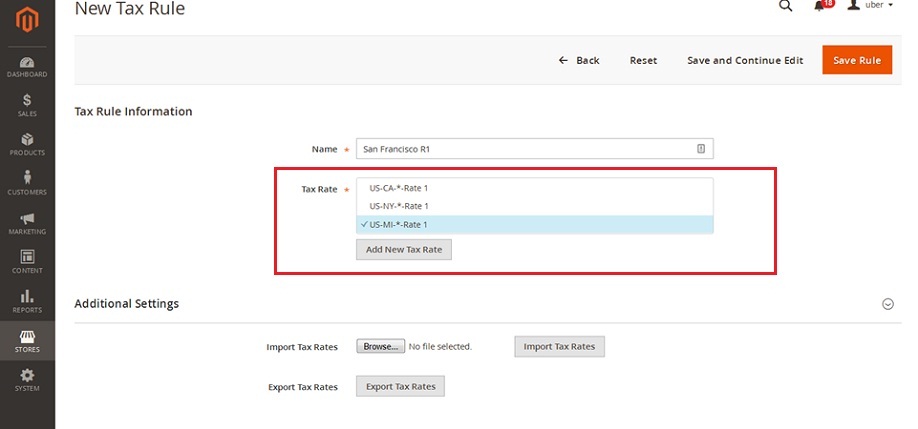
1) Name: This option is to name the tax rule which is recommended to be named as an easy remembrance of what the rule contains. For an instance we have selected “San Francisco R1”.
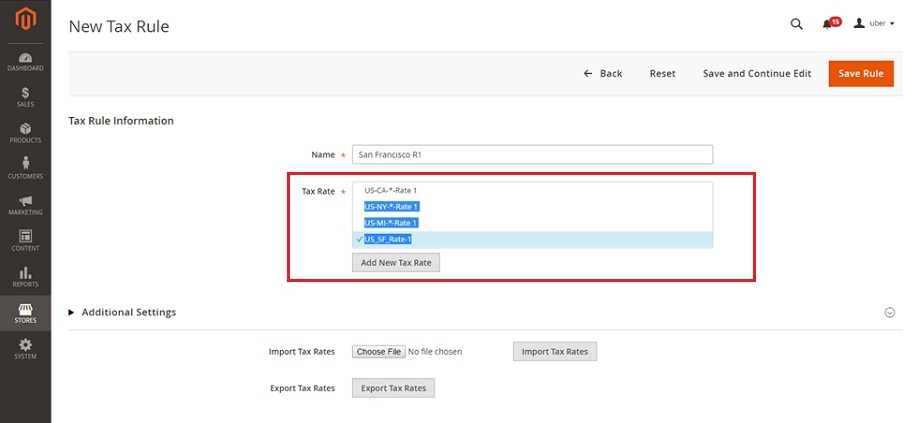
2) Tax Rate: This contains the collection of tax rates existing on your Magento2 store, from which you can either select one or more than one tax rates. Even you can edit your selected tax rate or can define a new tax rate as well with “Add New Tax Rate” button given at the end of the list of options, as we can see on the screen. The tax rule will be applied once the customer’s order information matches with the selected tax rates/zones.
We have selected the previously defined Tax rate “US_SF_Rate-1” (discussed in the earlier session of creating tax rates), for our new tax rule.
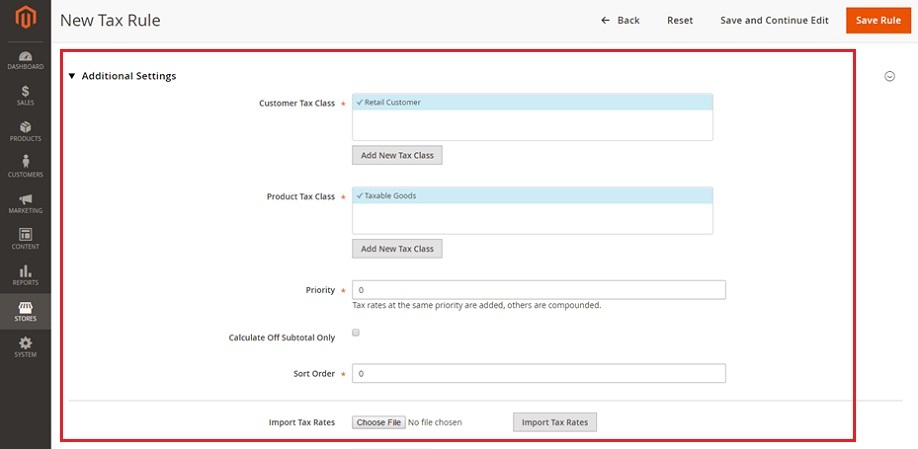
Next we have to expand the “Additional Settings” for completing the structure of “Tax Rules”.
Options as followed:
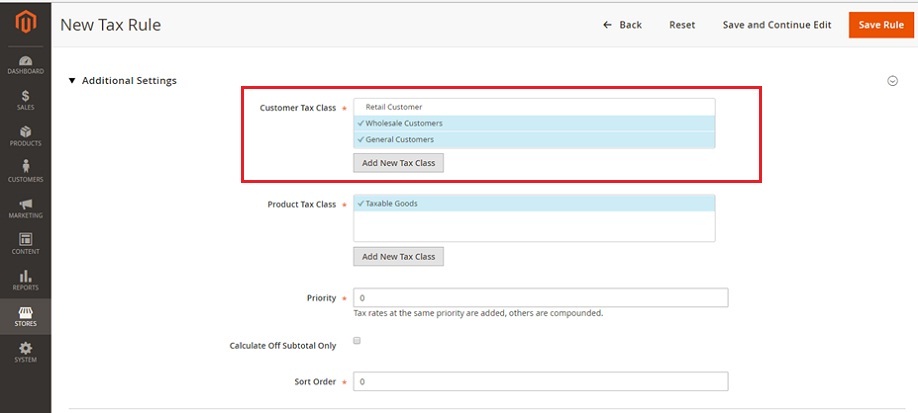
1) Customer Tax Class: We have the option of all the customer classes here, which can be selected as one or more with Ctrl option. The tax rule will be applied to the customers who are falling under the customer group of selected customer tax class. New Tax classes can be made with “Add New Tax Class” button.
By default here we have ”Retail Customer” as the selected tax class. But we have selected “Wholesale & General Customers” as customer tax class for our instance.
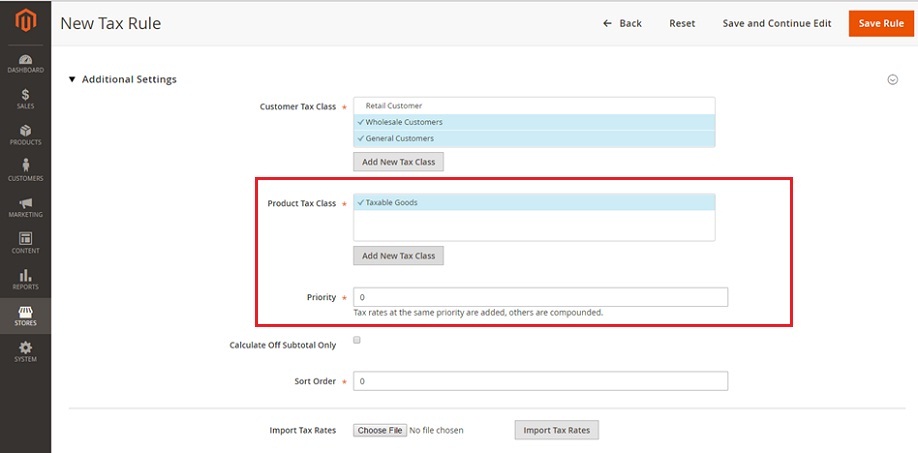
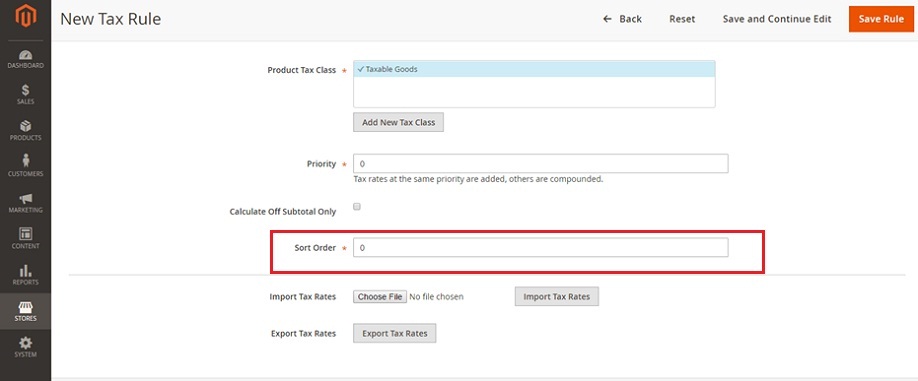
2) Product Tax Class: This is the tax class which is associated with the product, which we need to select for our new tax rule. We can define as many tax classes we like as per our product’s requirements; we shall delve into detail for that in our next video. For this moment, we have the “Taxable goods” as our selected product’s tax class.
3) Priority: This will prioritize your tax rule when other existing tax rules anyhow shares the same conditions, so the one with lower will be applied first & then the second one. We are selecting “0” to keep our tax rule on top of the list. Rules having the same priority will be added, whereas that with different priority, higher priority is preferred.
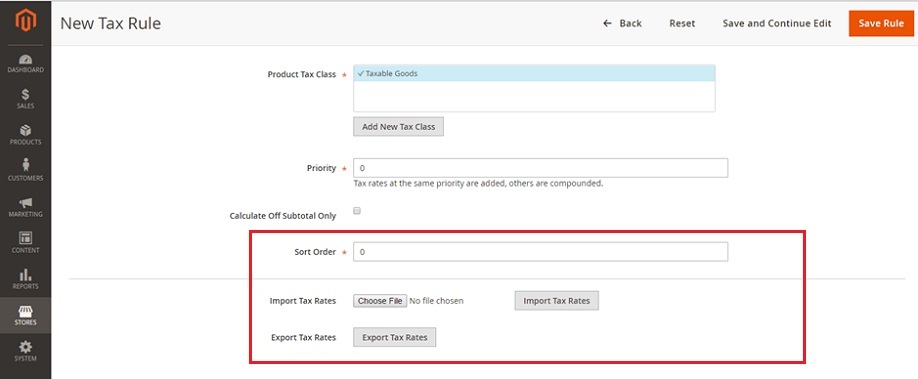
4) Sort Order: This will determine the sequence in which we need to apply tax rules. We have selected this as “0” as well.
Rests are the lasting options of import & export files for tax rates.
So just save the work done so with “Save Rule” button to apply tax rules for the selected customer & product tax class.
Next is what??? Next is go and explore Magento2 store and apply the Tax Rules for your required products & customer tax classes.
Avail our Custom Magento Development Services or do call us at: 855-370-5507. Our E-mail id is : magento@matridtech.net.
Leave your details and we will contact you back within next 12 hours.
Let your Magento store add more to your magnetic power to allure customers with our easy Magento support.

