How to Setup Tax Rates or Add Tax Rates in Magento2
Greetings of the Day My Friends!!!
We are welcoming you all in our learning session for “How to Setup Tax Rates or Add Tax Rates in Magento2”
In this session we are going to focus on Tax Rates. Tax rates will let you accumulate & refrain taxes from a specific geographical area. The tax rates are accompanied with different tax zones & unique identifiers which make us configure multiple taxes within a specific geographical area. Store address is closely linked with store tax. So once the customer has completed the order information for products, corresponding total customer tax is determined, which is based upon the tax configuration done for Magento2 store.
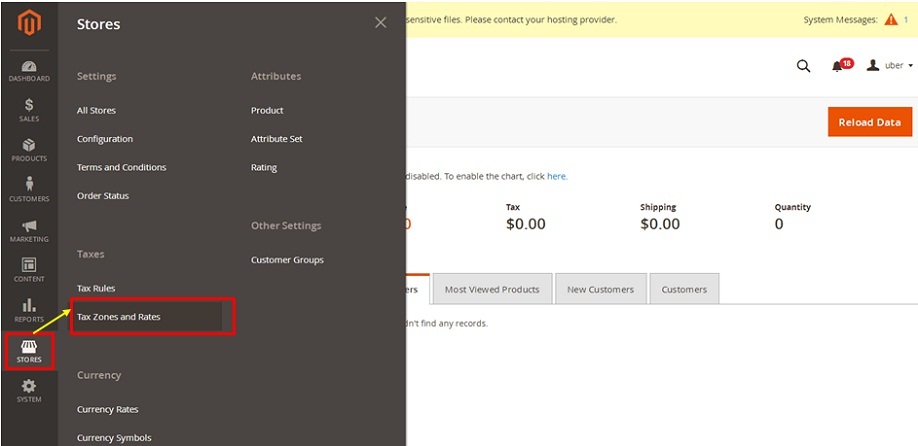
Let’s get practical with our words now & for this we need to dive into the “Admin panel of Magento2” for this, and crawl to the section of “Stores” and fetch the option of “Tax zones and Rates” falling under the title of “Taxes”.
Admin Panel → Stores → Taxes → Tax and Zones Rates
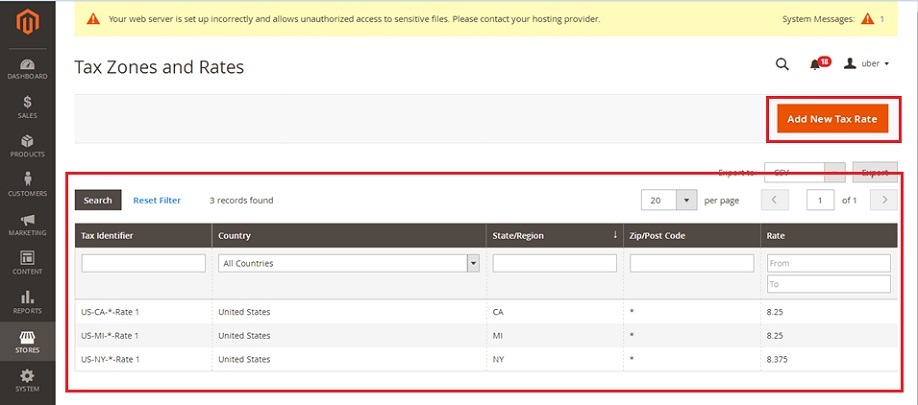
Clicking on the option we have the present screen of “Tax Zones & Rates” where we can see all the available tax rates & zones, and in order to add new tax rate we need to click on right above button “Add New Tax Rate”.
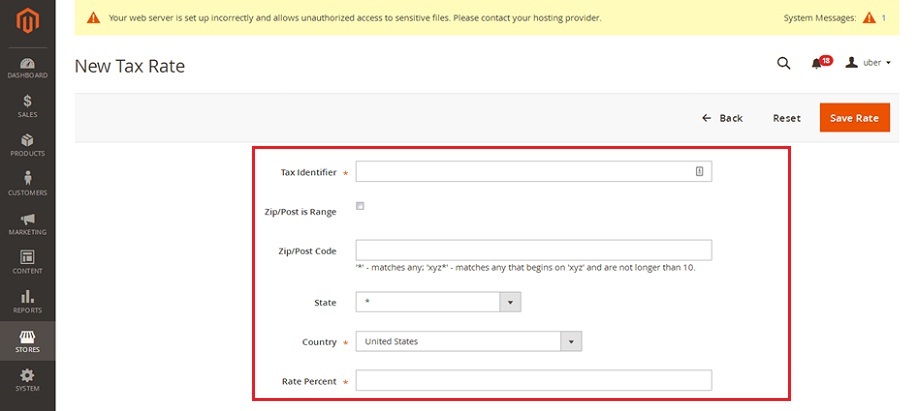
The current screen has options to set the new tax rate:
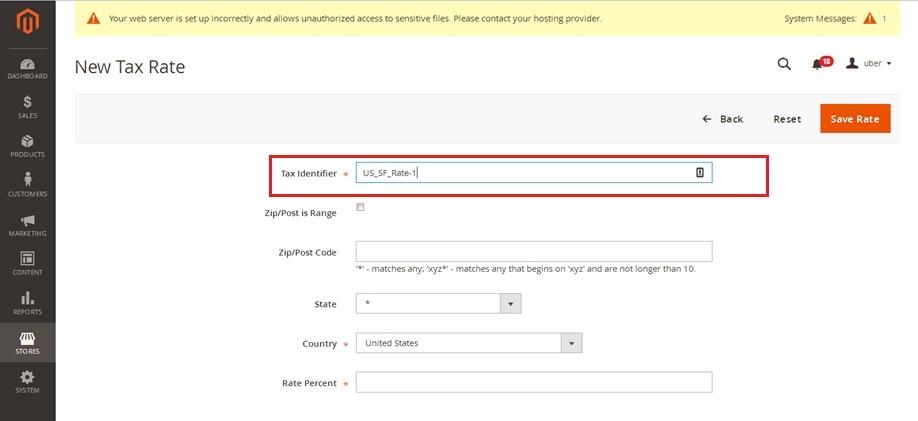
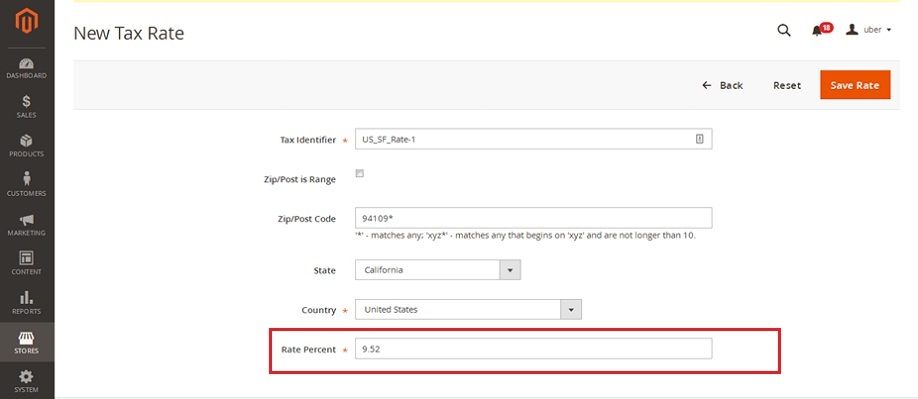
1) Tax Identifier – This is used to name the tax rate, with which we can identify easily our tax rates(names are separated by hyphens and underscore only) To be noted that it is only for internal reference, we need to specify the name for tax rate for our store-views with the Tax title options, else it will be visible even to our customers. Tax identifier help us to define tax rates for same zones & even to make it available for different zones.
For our instance we are keeping it as “US_SF_Rate-1”.
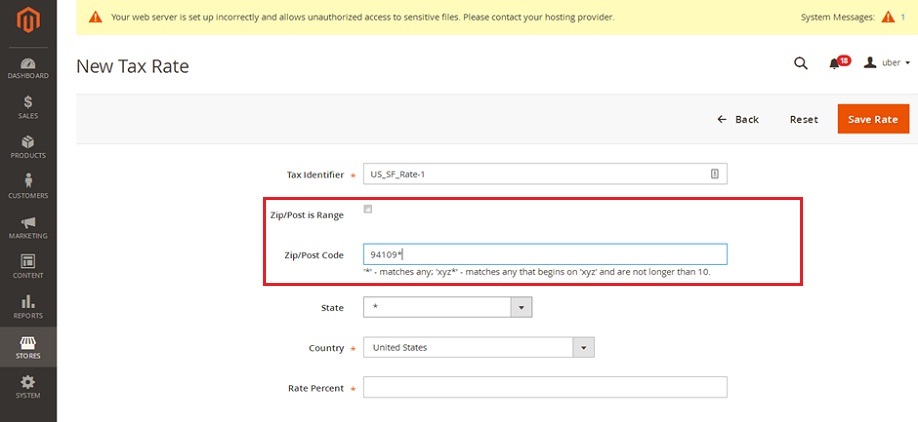
2) Zip/Post is Range – This option comes with two choices as “No” by default which will have the option of “Zip/Post Code” in the next level where we can define enter the “*” asterisk sign to apply tax rates for all customers or we can put some definite number followed with “*” and it need to match the exact pattern to apply rates. For an instance we are keeping it as “94109*”.
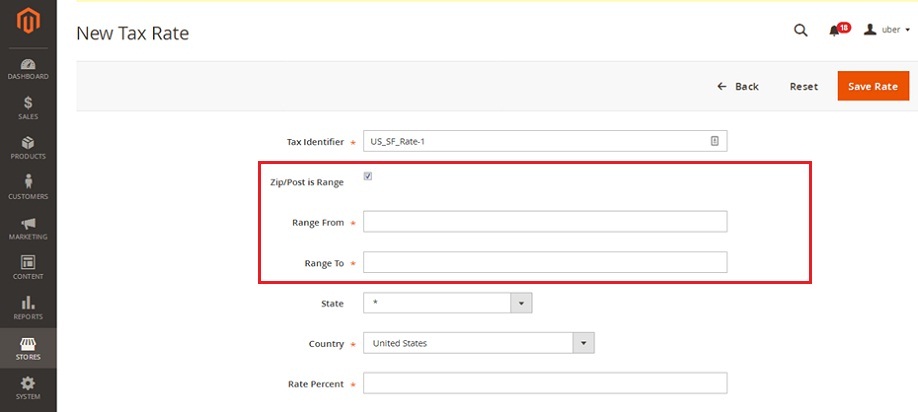
Second choice is “Yes” that will open the options of “Range From” & “Range To” defining the limit for Zip/Post Code for applying our tax rate.
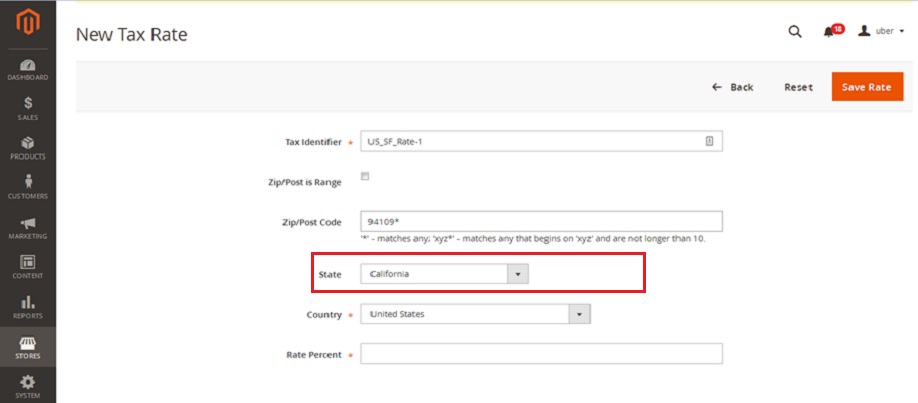
3) State – This option has the preconfigured set of state or province of the country selected, which we have to select for our tax rates. By default it comes with “*” asterisk sign indicating that the tax rates will apply to all states. However, in our instance we have selected “California”.
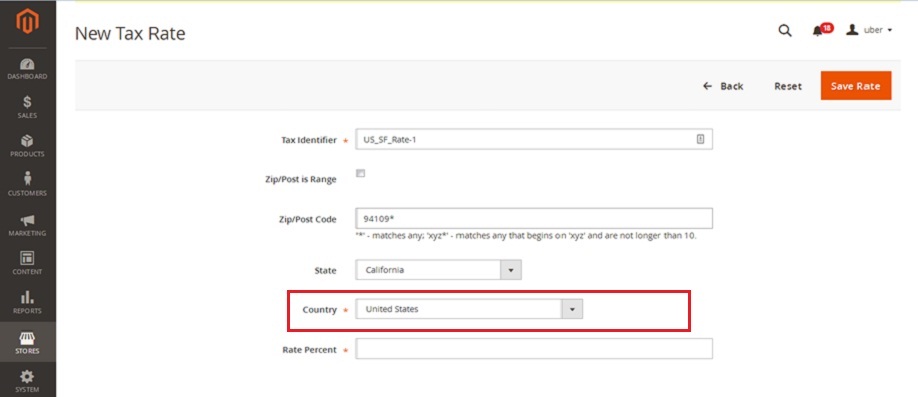
4) Country – We need to select the country name from given in the drop down menu to apply our tax rate. We have selected United States in our instance.
5) Rate Percent – This option determines the actual Percent of tax rate which we need to apply for the specified region.
Percent Rate in our instance is “9.52”.
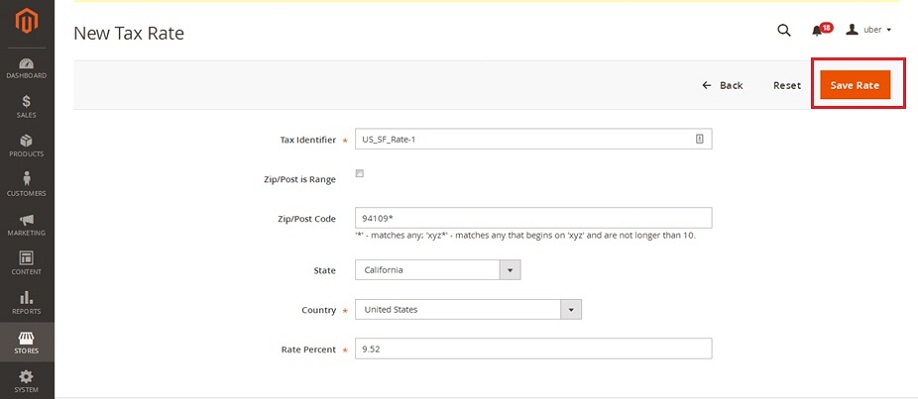
Now let’s save our work done so far with the“Save Rate” button given on the right above corner.
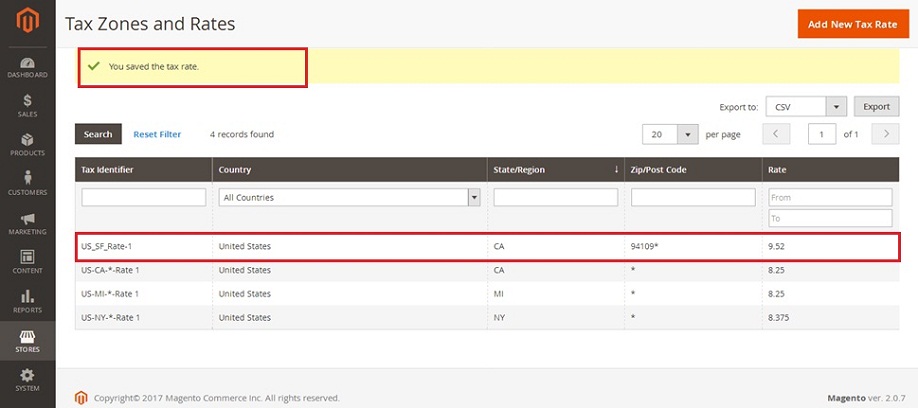
After this we can newly added tax rate of “US_SF_Rate-1” on the main screen of Tax rates.
We can also edit existing tax rate using the filter controls given on the main page of Tax Zones & Rates.
Next is what??? Next is your turn to go and explore your Magento2 store and add tax rates for specific regions.
Avail our custom Magento Development Services or call us at : 855-370-5507 or e-mail us at magento@matridtech.net.
Leave your details and we will Contact you back with in next 12 hours.
Let your Magento Store add more to your magnetic power to allure customers with our easy Magento support.

